Anarchy is Occurring
Perhaps inspired by world events, knitting anarchy is occurring here. Me? Do what I'm told? Not so much.
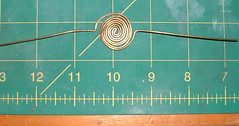
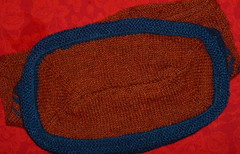
Kerry Blue Shawl is coming along:
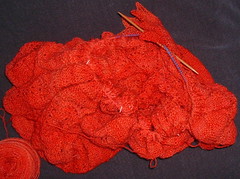
I know this looks more like a heap o' yarn, but trust me, the shawl is in there.
The pattern is nice to work, easy to follow, and I like the four-square construction: knitting from the center out, increasing every other round at the corners, makes a nice square. There is something disconcerting about the lace patterns in the shawl though, to me.
The first two patterns were linear, geometric, straight looking lace, and then we went into the classic shell pattern: not so linear, more curved and graceful. Somehow there was a visual disconnect to my eyes, the patterns seem randomly selected to fill the space, rather than connected to each other by some design concept. Perhaps just me, just ruminating, but there it is.
As the edge loomed, so to speak, I decided I would change a few things. First, I didn't like the look of the crocheted chain used to finish off the edge: I thought it would catch on anything and everything. So I was planning to just cast off the edge, loosely. Then I took a look at the lace design used to finish the shawl, a simple four-square grouping of holes, offset. I sort-of kind-of didn't like it, it just looked floppy and unfinished. The shawl needed a firm ending, like a period at the end of a sentence: a place where you know stopping is intentional.
So I tossed the pattern, did a row of yarn over/knit two together, and then started a simple knitted on edge pattern:
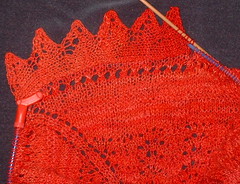
This edging is from Joan Schrouder's handout, very easy and very few stitches (Joan! get a website!). I like it so far, better than the edging called for in the pattern. I'll knit a side and see how I think this works. I've been looking through books of edging patterns, and have a plethora from which to choose. I've also been imagining this four-square shawl construction in other lace patterns of my own choosing. This is where trouble starts.
This *following patterns* stuff? I'm learning a lot. There are tips and techniques in every pattern I've tried, adding to my skillset and causing much thought, which can be good sometimes.
Other times? Well, as you see, those thoughts may lead to knitting pattern anarchy.
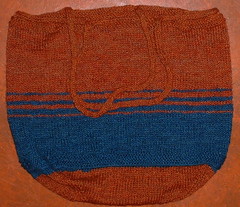
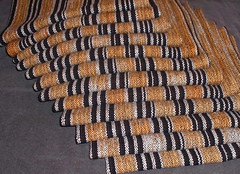
Kerry Blue Shawl is coming along:
I know this looks more like a heap o' yarn, but trust me, the shawl is in there.
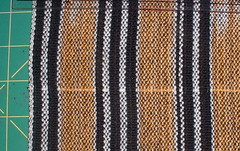
The pattern is nice to work, easy to follow, and I like the four-square construction: knitting from the center out, increasing every other round at the corners, makes a nice square. There is something disconcerting about the lace patterns in the shawl though, to me.
The first two patterns were linear, geometric, straight looking lace, and then we went into the classic shell pattern: not so linear, more curved and graceful. Somehow there was a visual disconnect to my eyes, the patterns seem randomly selected to fill the space, rather than connected to each other by some design concept. Perhaps just me, just ruminating, but there it is.
As the edge loomed, so to speak, I decided I would change a few things. First, I didn't like the look of the crocheted chain used to finish off the edge: I thought it would catch on anything and everything. So I was planning to just cast off the edge, loosely. Then I took a look at the lace design used to finish the shawl, a simple four-square grouping of holes, offset. I sort-of kind-of didn't like it, it just looked floppy and unfinished. The shawl needed a firm ending, like a period at the end of a sentence: a place where you know stopping is intentional.
So I tossed the pattern, did a row of yarn over/knit two together, and then started a simple knitted on edge pattern:
This edging is from Joan Schrouder's handout, very easy and very few stitches (Joan! get a website!). I like it so far, better than the edging called for in the pattern. I'll knit a side and see how I think this works. I've been looking through books of edging patterns, and have a plethora from which to choose. I've also been imagining this four-square shawl construction in other lace patterns of my own choosing. This is where trouble starts.
This *following patterns* stuff? I'm learning a lot. There are tips and techniques in every pattern I've tried, adding to my skillset and causing much thought, which can be good sometimes.
Other times? Well, as you see, those thoughts may lead to knitting pattern anarchy.
posted by Sara at 8:50 AM
6 comments
![]()
![]()


